Sunday, October 24, 2010

Fall Granola Goodies

For me Fall is one of my favorite times of year. I love so many aspects of this season from the clothing, the weather change, the FOOD, the smells (from seasonal foods cooking to seasonal candles burning) and knowing that Thanksgiving and Christmas are right around the corner! This fall is a bit different for me than falls in past. I find myself entering my THIRD TRIMESTER of my first pregnancy. Oh Baby how my senses have heightened. Not only is my sniffer picking up the slightest scents (and odors unfortunately) but my belly is constantly calling for something to munch on. I am eating about every two hours these days and with a consumption like that I am trying to be conscious of what I am putting in my mouth (key point...trying). I found this recipe for homemade granola bars in the October/November 2010 Taste of Home magazine and had to share with everyone. Its healthy (enough), easy to make, quick, and will fight off hunger pains longer than store bought substitutes. Plus the smell that fills the house is PERFECT for this time of year!!

Here is the recipe and pictures...

Ingrediants
3-1/2 cups quick-cooking oats
1 cup chopped almonds
1 egg, beaten
2/3 cup butter, melted
1/2 cup honey
1 teaspoon vanilla extract
1/2 cup sunflower kernels
1/2 cup flaked coconut
1/2 cup chopped dried apples
1/2 cup dried cranberries
1/2 cup packed brown sugar
1/2 teaspoon ground cinnamon

Directions
Combine oats and almonds in a 15-in. x 10-in. x 1-in. baking pan coated with cooking spray. Bake at 350° for 15 minutes or until toasted, stirring occasionally.
In a large bowl, combine the egg, butter, honey and vanilla. Stir in the sunflower kernels, coconut, apples, cranberries, brown sugar and cinnamon. Stir in oat mixture.
Press into a 15-in. x 10-in. x 1-in. baking pan coated with cooking spray. Bake at 350° for 13-18 minutes or until set and edges are lightly browned. Cool on a wire rack. Cut into bars. Store in an airtight container. Yield: 3 dozen


Before I put them in the oven

granola bars


granola bars


After and cut into bars

granola bars


granola bars


I think I am going to add chocolate chips next time....

ENJOY!

Sunday, September 19, 2010

Pillow Cookies & Chocolate Chip Cookies

Saw a recipe for Pillow Cookies on Bakerella and decided I had to try it. Needless to say, it was a success. Join your favorite boxed brownie mix with your blue ribbon chocolate chip cookies and call it heaven. Blue Ribbon Chocolate Chip Cookies

Ingredients:
2 1/4 cups flour
1 tsp. baking soda
1 tsp. salt
2 sticks butter - room temp
3/4 cup sugar
3/4 cup dark brown sugar - packed
1 1/2 tsp. vanilla extract
2 large eggs
2 cups semi-sweet chocolate chips

Instructions:

Preheat oven to 375 degrees.

In mixer, combine white and brown sugar. Add butter and vanilla extract. Mix until smooth. Add eggs and mix well.

To sugar mixture, add flour, soda, and salt. Mix until flour mixture and sugar mixture are combined. Fold in chocolate chips.

Using cookie scoop or spoons, drop tablespoonfuls of cookie dough onto cookie sheets. Bake 9-11 minutes or until golden brown. Cool on wire racks and enjoy!

Variation:

To make "Pillow Cookies", bake a batch of brownies (boxed or homemade) prior to beginning your cookie dough. Place a chunk of brownie in the middle of your cookie dough before baking. They are delicious!

Wednesday, September 15, 2010

Chicken Fried

If you show up to Sunday Dinner at my husband's Grandma Nellie's you will either be treated to a turkey dinner or fried chicken. Myself, I have never fried a chicken - I tend to purchase mine in the deli section of Albertson's Grocery Store. Lucky for us, one of Chad's students had an FFA project where he raised chickens and sold them. Of course, we bought some and threw them in the freezer.

Now, an entire chicken is slightly intimidating and I have never even handled a whole, raw chicken (seriously). Turkeys, chukars, pheasants, yes... chicken, no. This past Sunday one of Chad's fraternity brothers and good friends was going to be passing through on his way home from the Idaho/Nebraska football game. I thought it would be nice to have him join us for a home-cooked meal so I grabbed the chicken out of the freezer and mentioned to Chad that if he got bored while I was gone in town, he could cut it up.

Two hours later, I come home to a still frozen chicken and napping husband. I set it out on the front porch to thaw faster and I begin to prepare my materials to fry this chicken. First things first, I google how to cut up a chicken. I use this method provided by Gourmet Sleuth. To my surprise, it works.

Then, I searched online for "Chuck's Day Off Spiced Buttermilk-Marinated Fried Chicken" because I had seen it on the Cooking Channel and I knew if mine turned out half as good as Chuck's looked - we would be in business. Below are the ingredients, instructions (from cookingchannel.com), and of course, pictures!

Ingredients:
  • 4 tablespoons kosher salt
  • 3 tablespoons freshly ground black pepper
  • 2 tablespoons ground cayenne pepper
  • 2 teaspoons garlic powder
  • 2 teaspoons onion powder
  • 1 teaspoon dry mustard powder
  • 2 cups all-purpose flour
  • 8 chicken drumsticks (in my case, a whole chicken)
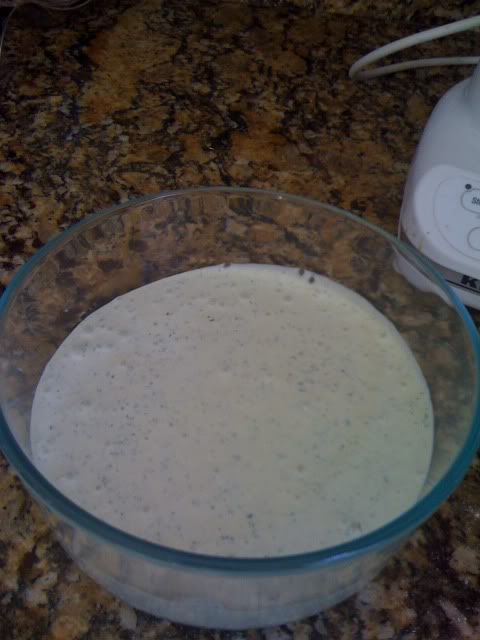
  • 4 cups buttermilk
  • Canola oil, for frying
Instructions:
Mix the salt, pepper, cayenne pepper, garlic powder, onion powder and dry mustard powder together in a bowl. Divide the spices evenly between 2 mixing bowls. Add the flour to 1 of the bowls, mix well, and set aside. (I made 1 1/2 of the spice mixture and used one whole mixture for the rub and used the other 1/2 for the flour mixture. I think it just depends on the amount of chicken you have).

Rub the chicken drumsticks with the reserved spice mix. Poke all of the pieces with a fork a few times to let the flavors seep down into the meat. Set aside.
Pour the buttermilk over the chicken, and cover the bowl with plastic wrap. Refrigerate for at least 1 hour. Cook's Note: You can also let the chicken marinate longer, even overnight.

Add the flour mixture to a large re-sealable plastic bag. Remove the chicken pieces from the buttermilk and in batches, drop them into the bag, shaking them to make sure they become heavily coated.

In a large heavy-bottomed saucepan, pour enough oil to fill the pan about a third of the way. Heat over medium heat until a deep-frying thermometer inserted in the oil reaches 360 degrees F. (If you don't have a thermometer, a cube of bread will brown in about 3 minutes.)

Drop the coated chicken drumsticks into the hot oil. Turn the pieces as they brown and do not let them touch each other while frying. Work in batches, if necessary check the underside of a piece by lifting it with tongs. It should be a deep golden brown. Cook the chicken until the pieces are crispy and brown, about 15 minutes, turning occasionally.
To test for doneness: Cut into the thickest part of a drumstick. The juices should run clear and the meat should be opaque throughout. If necessary, pop the chicken into a preheated 325 degree F oven, until they are fully cooked.

Transfer the fried chicken to a paper towel-lined baking sheet to drain the excess oil.

Transfer the drumsticks onto a serving platter, or put into a bucket. Serve the chicken hot, room temperature, or cold.
Oh my goodness, best friend chicken I have ever eaten. Ever. Thank you, Chuck for your recipe - I am in love with this.

Tuesday, September 14, 2010

Tomato-Mozzarella Salad

Ingredients:
Fresh tomatoes - cut into wedges (or halves if using cherry tomatoes)
Mozzarella balls - halved
Fresh basil - chopped
Extra virgin olive oil
Salt & PepperInstructions:
Mix together to taste. I generally do about half-and-half on the tomatoes and mozzarella balls... but I am in love with mozzarella. Toss the basil, EVOO, salt, and pepper to taste.

My mom gets even more creative and adds red onions, balsamic vinaigrette, and garlic. Try it, you won't regret it!

Enjoy!

Sunday, September 5, 2010

Spicy Deliciousness Dip

I couldn't resist sharing this horribly addictive recipe I experienced for the first time a few weeks ago (Thanks Caroline). Its a jalapeno cilantro dip that is excellent with tortilla chips. I had it at a fantasy football draft party and have since made it for tailgating. It's a great addition to any gathering. Here is a double bonus, it's INCREDIBLY easy and quick to make.

Getting Ready to Blend

dip in blender
Post Blend. If you place in the refrigerator for bit it firms up
making it the perfect consistency!

Post Blend
Here are the goods...
16oz Sour Cream
1 Packet Ranch Dip
3/4 Cup Pickled Jalapenos
1/4 Cup fresh Cilantro
Add ALL ingredients to blender...BLEND...ENJOY

Monday, August 16, 2010

Yummy Fruit Dip


Need a little something to dress up your fruit platter? This EASY and delicious fruit dip is just the ticket. In your mixer, place 8 ounces cream cheese (one box) and 13 ounces Jet-Puffed Marshmallow Creme. Mix well. Once smooth, add the juice of a fresh lime or orange to taste. Blend until smooth. Enjoy - it's wonderful... I never said it would be healthy!

Sunday, August 15, 2010

Spinach-Artichoke Dip

Ingredients:
26 ounces of jarred artichoke hearts (four small jars) - the jarred is better than the canned - chopped
20 ounces chopped spinach (two packages of the frozen stuff) - thawed, rinsed, drained
1 cup sour cream
1 cup mayonnaise
1 1/2 cups Parmesan cheese
4 tsp. minced garlic - I buy it at Costco
1/2 tsp. pepper

Instructions:
Mix it all up, put it in a baking dish and bake approximately 30 minutes or until top and edges are browning. I serve it with crackers and/or veggies.

Thursday, August 12, 2010

Cheap and Easy...A Few Of My Favorite Things

I made this dish for dinner tonight and LOVED it. It was so easy, most of the items needed were already in my pantry/fridge and it was fast. What is not to love about all of those things?


Cayenne Rubbed Chicken with Avocado Salsa
Photobucket
Ingredients:
•Coarse salt and ground pepper
•1/4 teaspoon cayenne pepper
•4 boneless, skinless chicken breast halves (6 to 8 ounces each)
•2 tablespoons olive oil
•1 medium red onion, finely diced
•2 tablespoons fresh lime juice (or 1/2 of lime squeezed)
•1 Hass avocado, pitted and cut into chunks (if they are on the small side I suggest 2)

Directions:

•In a small bowl, combine 1 teaspoon salt, 1/4 teaspoon pepper, and cayenne; rub all over chicken. (FAST HINT: sprinkle each side of the chicken with each ingredient, then rub. The spicier you want it, the darker red you need to make it)

•In a large skillet, heat oil over medium. Add chicken, and cook until browned on the outside and opaque throughout, 8 to 10 minutes per side.

•Meanwhile, in a medium bowl, combine onion and lime juice; set aside. Just before serving, fold avocado chunks into onion mixture; season with salt and pepper. Serve chicken topped with salsa.


Done...that's it...EAT UP!!


This recipe is from Martha's fabulous collection

Saturday, July 31, 2010

Perfect Panini

Sandwiches are a great summertime meal for this exact reason and are even better grilled.  I have probably grilled a hundred of these things, so I thought I would share with all you lovely readers my method to making the perfect panini.
The great thing about the panini is that there are thousands of combinations you can come up with... prosciutto/ mozzarella/tomato, brie/pear/arugula, nutella/strawberry, I could go on and on.  Despite the combination you choose, I would venture to say that the most important ingredient of the panini is the bread.  I like to use any sort of focaccia that is thick enough to slice in half.  I usually get mine at Central Market or even Super Target has small round focaccia that are good for this purpose (shown).
Before you get started, preheat your panini press.  I use a Cuisinart Griddler and love it.  The top of it is on a floating hinge so it presses sandwiches flat no matter how thick they are without squishing all the goods out of the other end. And it also comes with smooth plates that you can use to make pancakes.
The most important step of the whole process is the inside out assembly.  First cut the focaccia in half and then flip inside out so the outside is now the inside.  This not only gives you a flatter surface on the outside to press, but it will also keep all the focaccia-y goodness from getting burned.  So turn it inside out, and then build it as you would any other sandwich.
After you have it built, drizzle/brush the outside of the sandwich with olive oil.  Or if you are lazy and want to make your life even easier, spray it on both sides with this wonderful little product.  Note: by no means is this fancy, but since you don't even really taste the olive oil, I don't think it's a bad shortcut to take.
Place on panini press and push down on lid to squish flat (note: these are all technical terms). The floating hinge is great, but I usually build the panini so it angles up to one side a little and then put that side towards the back so when it squishes, it moves the top half to be even with the bottom. (Shocking display of anal retentiveness from a Non-Type A such as myself, I know).
Grill for 5- 8 minutes to your desired crispiness, pull off, cut in half and enjoy*!  I am a firm believer that grilling makes any sandwich taste better and even with as much as I'm in my kitchen- the panini press is still one of my most heavily utilized appliances.

*Enjoy carefully depending on your ingredients: I don't know if I have dull teeth or if I am just inept at the skill of eating, but I was enjoying the pictured panini when I apparently didn't completely sever a tomato. I pulled the entire thing out of the sandwich with my teeth and it wrapped its piping-hot, fresh-off-the-grill, little self around my chin.  I started yelping and flung it off my face onto my lap where it burned my thigh. My roommate was observing all of this with quite a sense of amusement.  But seriously, that shit hurt.  It burned my face so badly that it peeled. Literally peeled. I took a picture to document my tomato assault/kitchen battle wound:
Ridiculous, I know.  

But anyways, happy eating and BE CAREFUL out there!

Wednesday, April 21, 2010

Crock Pot Meatloaf

As a child, I never liked meatloaf - there was just something about it. One day though, I was walking through the dinner line at my sorority and I smelled something delicious. You see, we rarely had beef, and once I saw it was meatloaf, I thought I had better give it a try. It was good, paired with mashed potatoes and a fresh green salad, it was really good. I have always made my meatloaf in the oven, but this week, I attempted a crock pot meatloaf and according to Chad, it was the "best meatloaf yet".

Ingredients
2 eggs, beaten
3/4 cup milk
2 1/2 slices bread - ripped into small pieces
1/4 cup onion, chopped
1 T Pampered Chef Italian Seasoning
1 t. salt
1/2 t. pepper
1.5 lbs. ground meat (deer, elk, beef, etc.)
1/4+ cup ketchup
1 t.+ dry mustard
2 T+ brown sugar

Instructions
In large bowl, beat eggs. Pour in milk and top with bread crumbs. Add seasonings and mix well. Next, add ground meat and mix until completely combined.

Prepare crock pot with non-stick spray and put meat mixture into crock pot. Using a spatula, shape meat into a "loaf".

Cook on low for 4-5 hours. During the last half hour, mix the ketchup, dry mustard, and brown sugar in a small bowl and pour part over the loaf.

To prepare the bacon, preheat oven to 375. Line a cookie sheet with aluminum foil and fill with bacon. Spread ketchup mixture over the top of bacon. Bake 10-15 minutes or until cooked to your liking. Cut loaf into slices and serve with a piece of bacon and any other sides!

Side-note - when I make meatloaf in the oven, I put the bacon and ketchup mixture on at the very beginning. The bacon is the best part.

Enjoy!

Wednesday, April 14, 2010

BBQ Ribs

We have a stocked freezer and when my husband wants to have something for dinner, he will generally set it on the counter to thaw - as a "hint". If I don't make anything with it for a few days, he generally takes matters into his own hands. So, the other day, I came home and there were pork ribs on the counter - thawing. Here's what I did with them...

BBQ Ribs Ingredients
Ribs
Salt
Pepper
1/2 cup chopped onion
1 T chopped garlic
1/4 cup soy sauce
1/4 cup packed brown sugar
1 bottle Yoshio's BBQ Blend

BBQ Ribs Instructions
Preheat oven to 350 - Broil. Cut ribs so they fit on broiler (meat side up) and salt and pepper to your liking. Broil for 15 minutes. Remove from oven and cool.

While ribs are broiling, combine onion, garlic, soy sauce, and brown sugar in bottom of crock pot.

Once ribs are cool, cut into serving-sized pieces and place in crock pot atop onion mixture.

Pour entire bottle Yoshio's BBQ Blend over ribs and onion mixture. Cook on high for one hour and then low for four-five hours.
Yum! Enjoy!

Wednesday, March 31, 2010

Easy Country Style Swiss Steak

Lately, I have been obsessed with my crockpot - making everything from pulled pork sandwiches to fajitas to Swiss steak! This recipe is super easy, and I usually have all the ingredients on-hand, not to mention, Chad and I both love mushrooms (or fungus as my brother calls them). I tend to use elk steak in this recipe, but it can easily be substituted with beef - and because the crockpot tenderizes the meat, I usually use the lesser quality cuts from the freezer.

Ingredients:
2 lbs. (approximately) steak (elk, beef, etc.)
1/2 cup flour
1 T garlic salt
1 tsp. butter
1 Spanish Sweet onion, chopped
1 cup mushrooms, sliced
1 can cream of mushroom soup
1 cup water
noodles

Instructions:
Trim steak and cut into serving sized pieces. Mix flour and garlic salt in Ziploc bag. Place steak pieces into bag and flour on both sides. In frying pan, melt butter and lightly brown both sides of steak.

Meanwhile, peel and chop the onion. Combine mushrooms, cream of mushroom soup, and water - mix well. Place browned steaks in the bottom of crockpot, followed by chopped onions, and mushroom soup mix. Set the crockpot on low for 7-8 hours. Serve with noodles and enjoy!

Monday, March 15, 2010

Holy Guacamole!

I tend to get requests to make my Guacamole quit a bit. Granted most of them are from my hubby (weekly) but I also get hit up for any major sport watching event, whenever we grill out with friends, showers/engagement parties etc...

I have also had a few of my friends ask me how to make Guacamole. Which at first I thought was kind of funny because its basically mashed up avocados with some extra goodies mixed in but a lot of people think its some magical recipe. I am here to tell you it's super easy, anyone can do it and to STOP buying that green premade "guacamole" they sell at the grocery store...its not real...gag!!
First start with avocados, halved, seed removed and shelled into a bowl like so...
(this is 5 avocados - I usually will use only 2 if I am making it for just my hubby and myself)


Once all of the avocados are in the bowl I will run a knife through them to help break them up (pre-mixing) without actually having to stir them which makes my guac a little more "chunky" than smooth. The more you mix & stir the avocados the more they break down and will result in a smoother consistency. But beware...do not over stir at this stage. You will be mixing in the next few steps which will help create a "spread" like consistency.
The next step, add the extras! I tend to like things a little more spicy so I choose to add spicier ingredients. Here is the trick with spicy...spicy foods equal flavor. If you do not like spicy things it doesn't mean you shouldn't add some, or all of these ingredients. You should just add them moderately.
Added ingredients:
Red Onion
Jalapeno
Cilantro
FRESH Lime Juice
Tomatoes


Secret tool I LOVE!!! My "chopper". This one is from Pampered Chef but you can get them at any store that sells cooking tools. I use this thing all of the time! It is a HUGE time saver and honestly does a better job at chopping things like onions, jalapenos, cilantro, etc than I do.
Make sure to pre-chop/slice ingredients before adding to chopper for a better result.

Onions chopped and ready to be added to the mix. If you want them more fine...chop longer :-)


All the goodness in one bowl - pre mixed!


TA-DA!!! Yummy Guacamole!! ENJOY!
(the seeds help it from turning brown)


Wednesday, March 10, 2010

Sliders - Home Style


I was at the grocery store the other day and saw these cute little mini buns and the infamous Jack in the Box commercial instantly popped into my head.


I couldn't resist making sliders for dinner that night. I rounded up the remaining ingredients and headed home.

The secret to any good burger are these two ingredients. A few shakes (6-8 per lb) of each will give life to your beef without losing the "hamburger" taste we all crave and love.


Since we didn't have any propane for the grill I resorted to the skillet. To be honest, looking back I think I will cook them stove top from here on out. They are too small to really grill, and may cook to fast and dry out.

Yummmmm...Cheese....


The finished result....TA-DA!! This one is garnished with red onions and spicy guacamole. We also had mustard and pickles as finishing touch options.


These were a hit with hubby! We ended up eating TEN of them!!!!!

-Enjoy-
Jodi

Thursday, February 18, 2010

Adventures & Chicken Tequila Fettucini

As it is with most things in my life, the time I spend in my kitchen always tends to be adventurous. Whether it ends up with toasters on fire, marinara on the ceiling or just looooots of empty wine bottles, I always have fun!

Monday night was no exception. Jodi and I needed to get together to order the invites for a shower we are cohosting and I just so happened to have all the ingredients needed to make chicken tequila fettucini on-hand. Perfect!

This recipe was what made me fall in love with cooking. I was a city girl living in Lubbock, Texas (aka nowhere NEAR California Pizza Kitchen where the recipe was created) and this was one of my favorite dishes. The realization that CPK had a cookbook + some stubborn determination led me to tackle this somewhat complicated recipe as my first real culinary feat. Nine years and countless attempts later, I think I finally have this sucker down. It is pretty much as close to the original as you can get. Ironically enough, even though I am back in Dallas, I rarely venture out of my kitchen to go to CPK when I am craving it.

So Monday night I decided to bust this recipe out. I'm not sure if it was the year and a half of heavy use, the fact that I had all four burners going at once, or a faulty product, but midway through meal prep my vent hood started making these horrible noises and stinking. I mean stinking.

Jodi and I were honestly afraid it was going to blow up, but since it comes on automatically we had no way of turning it off. So we turned the gas off, took a few steps back, and pulled out the fire extinguisher (thanks mom and dad!). It wasn't getting better so Jones made the executive decision to locate the breaker. We scouted the house, found the breaker and turned the kitchen off. Only problem- the burners wouldn't relight and dinner wasn't finished. So being the intelligent, girl-scout-problem-solving-ish girls that we are... we decided to flip the breaker back on, relight the gas burners, and then flip it back off and see if we could finish dinner that way. Sure enough, it worked!

Dinner, check! House not burning down, check!

If I've said it once, I've said it a hundred times... Martha WHO???

To make a long story short: we survived, the house is still in tact, and dinner was delicious. Teensy tiny Jones even had seconds! (something I've rarely witnessed even though I'm told she rarely met a Budweiser she didn't like in college).

To get the deeeelicious Chicken Tequila Fettucini recipe click here.

And just for sh*ts and giggles since blog posts without pictures are like a fat kid without cake, a picture for you of Jones and I getting into trouble as usual (this time was in NYC if my memory serves me correctly):
Cheers!

Wednesday, February 17, 2010

Real Estate Apple Pie

For the whole story about the title, visit my personal blog, but I will give you the shortened version... My husband and I were recently approached by a local real estate agent to do a one-time showing and in the process of preparing the house, I purchased a bunch of apples. I already had Fuji apples, but they are not good for baking, so I bought several Granny Smith and Red Delicious apples because I wanted to have a variety of color. I suppose I should have called Jodi for advice, since she is the one with the experience in that department, but it was kind of a whirlwind. Anyway, a few days passed after the showing and we had eaten a few of the apples, but I needed to do something with them, so I decided to dust off my trusty apple pie recipe and add a twist. Usually, I use Granny Smith apples in my pies, but this time, I used three Granny Smith, three Red Delicious, and one Fuji apple. It may sound funny, but trust me, it was delicious.

Ingredients:
3 Granny Smith apples, peeled, cored, and cut into thin slices
3 Red Delicious apples, peeled, cored, and cut into thin slices
1 Fuji apple, peeled, cored, and cut into thin slices
1 T lemon juice
2 T flour
3/4 cup sugar
1 tsp. Pampered Chef Cinnamon Plus Spice Blend
1 Box Pillsbury Refrigerated 9-inch Pie Crust (2 crusts enclosed) at room temp
*If they can make it better than I can, there is no point in me killing myself to make it homemade!
Instructions:
Preheat oven to 375 degrees. Peel, core, and slice apples into large mixing bowl. I tend to slice my apples thinner than most, but that just means more surface area for the sugar and spice mixture!

Once apples are all in bowl, top with lemon juice, sugar, flour, and spice blend.
Mix well, until apples are coated with sugar and spice mixture. You may need to perform a taste-test at this point, because the apples are so delicious.
Unroll your first pie crust (if you forgot to take it out of the fridge/freezer, you can always pop them in the microwave for a few seconds to make them unroll easier) and place into pie dish. Smooth on bottom, against sides, and make folds in crust where necessary. Once prepared, spoon apples into pie dish, leaving the remaining juice behind (or your pie juices may overflow into your oven). Level the apples and if too full, remove slices.
Unroll second pie crust and place over apples in pie dish. Fold the edges over and knead the two crusts together to form a seal along the edges. Once all edges are closed, use a fork to poke holes in the top of the crust and I always put an "A" in the center - for Apple, of course! You can also use your fork to press down the edges of the pie for a decorative edge, but I did not on this pie.
Using a pie-crust shield or tin foil, cover the outermost edges of the pie to protect them from burning. Bake pie at 375 degrees for 40 minutes, check pie. Bake 20 minutes longer. Allow pie to cool and enjoy!

Lemon-Butter Salmon

My husband is not only an avid hunter, but fisherman as well. Living in Eastern Oregon, we have access to many salmon and steelhead fishing areas in both Oregon and Idaho and he tends to take full advantage. For this reason, we have a LOT of salmon in our freezer. We have experimented quite a bit with various recipes and this one is always a favorite.

Ingredients:
Salmon - shown below is a half-salmon cut into two large steaks
Lemon Pepper
1 cube butter (melted)
1/2 cup Lemon Juice
1/4 cup yellow Spanish Sweet onion, chopped
1 lemon, sliced

Instructions:
If salmon is frozen, be sure to thaw in the refrigerator before preparation. Preheat oven to 350 degrees.

In medium glass dish, place salmon steaks (skin down). Melt butter, and then pour butter and lemon juice over salmon and season (to your taste) with lemon pepper (I tend to use more than most).

Chop onions and sprinkle over salmon. Slice lemon and arrange slices atop salmon and onions. Sprinkle with additional lemon pepper and lemon juice if desired.

Bake 30-45 minutes, or until salmon is flaky. Keep an eye out for bones and enjoy!